Monday, July 8, 2013

Giant Chocolate Cookie


Giant Chocolate Cookie


Giant chocolate cookie, I don't think I've met anyone who is opposed to that idea. Gina and my mom were in their crazy moods again and went out and ran another half marathon. Since I have a brain I stayed at home and made them something to look forward to when they got home. That way when running, they could act like they are running towards a giant cookie way better then what they actually get when they finish which is warm bananas and being surrounded by a lot of other sweaty bodies. 


These cookies are huge. Like the size of my hand/face huge. Maybe even bigger then the size of most peoples brains. Just saying. 


The cookie is so thick it is sort of like a brownie in the middle part. The first time I attempted to make these the recipe was sort of a dud. It came out like the picture below. It didn't look very appealing, however it still tasted good. The original recipe was made to make one giant cookie. However it required measuring out half a beaten egg and that sort of weird thing. After the following results I decided to change it. There was enough dough for TWO giant cookies.


Yum Yum Yum ginat cookies. Because if you eat a normal sized cookie you always want another, this just saves you the extra trip to the kitchen.

Ingredients:

1/4 C butter (softened)
1/4 C brown sugar
1/4 C granulated sugar
1 egg
1 tsp vanilla extract
1/2 C flour
1/3 C cocoa powder
1 tsp baking soda
1/2 tsp salt
1/2 C dark chocolate MnMs

Directions:

Preheat oven to 350. Prepare a baking sheet. 
1. In a bowl combine the butter and the sugars
2. Next beat in the egg and vanilla
3. Add in the flour, baking soda, salt, and cocoa powder. Add them all into the bowl before you stir, thats my way of making sure they all are evenly combined without having to dirty another bowl. 
4. Fold in the MnMs
5. Divide into two separate mounds and spread apart on the baking sheet. Bake for 15 minutes. 

Mocha Cookies


Mocha Cookies 


Coffee and chocolate, the magically mixture. Personally, I hate coffee. The only drink I can stand with coffee in it is Starbucks mochas, but I don't even know if that counts as real coffee. I've been trying to branch out lately and force myself to try other coffee drinks. The mocha cookie recipe was inspired by the recipe in the Mrs. Fields cookie book. However it needed some adjustments. 


Normally you would use instant coffee in these types of recipes, however we didn't have any. So we used mocha mix instead. It seemed to have the same effect. 


The Mrs. Fields version also called for less coffee granules and coffee liqueur. Of course I wanted to use more. That way it would have more of a mocha kick to it. The first time we made these was for my friends birthday. That adjustments we made then provided a good cookie, but the second time we made them I added in even more mix and liqueur. 


These cookies were soft and thick. Oh and did I mention chocolatey? I used dark chocolate chunks in the recipe instead of semi-sweet chocolate chips. I would recommend the dark chocolate chunks. 


If you bite into one of these cookies right when they come out of the oven, you get a mixture of coffee and warm melted dark chocolate. Best bite ever. 


Ingredients:

1/2 C butter (softened)
1/2 C granulated sugar
1/2 C brown sugar
1 egg
3 tablespoons mocha mix ( or 3 tsp instant coffee granules) 
2 tablespoons coffee liqueur ( if using instant coffee use 2 tsp)
1 1/2 C flour
1/4 C cocoa powder
1/4 tsp baking soda
1/8 tsp salt
2 C chocolate chunks 

Directions:

Preheat oven to 350. Prepare a baking sheet. 
1. In a small bowl dissolve the mocha or coffee granules in the coffee liqueur 
2. In another bowl mix together the softened butter and the sugars. 
3. Add in the egg and the mocha mixture. 
4. Add in the flour, baking soda, and salt. Mix until combined
5. Fold in the chocolate chunks
6. Bake for 8-10 minutes, let cool on a wire rack 


Thursday, July 4, 2013

Devils Food Cake


Devils Food Cake


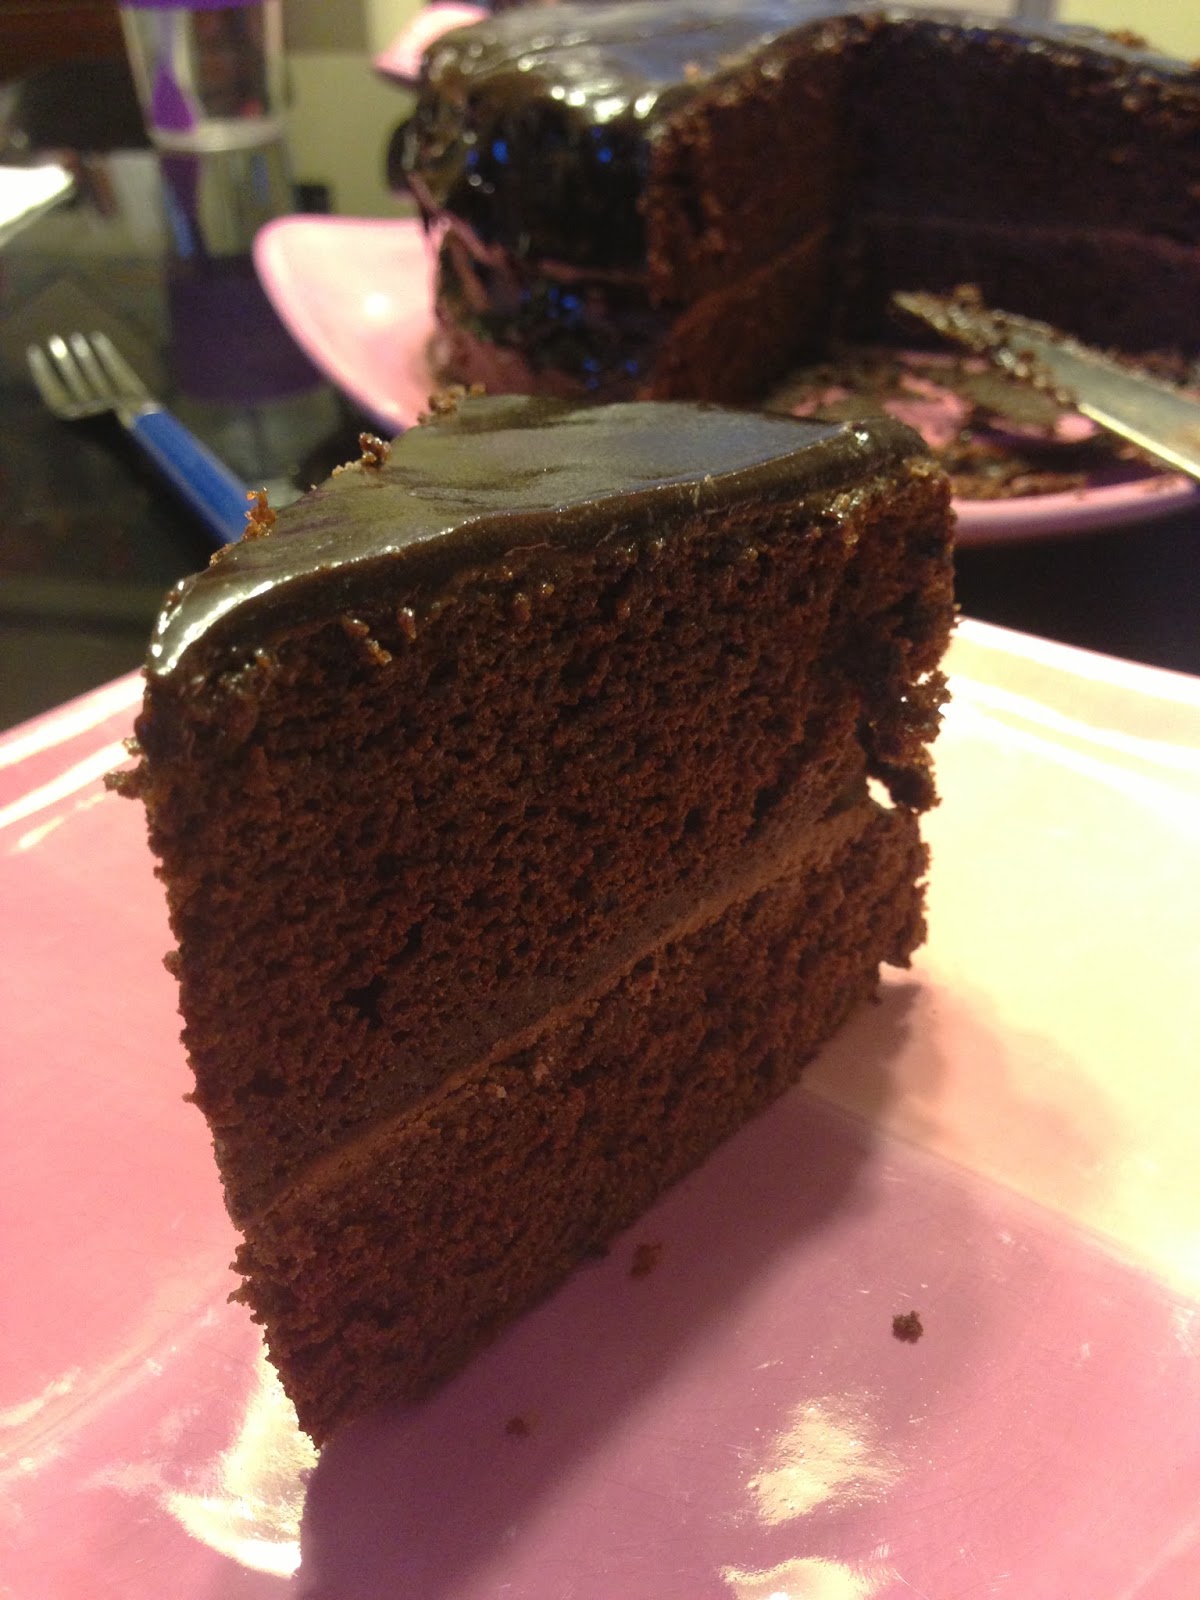
Do you know how devils food cake got its name? Actually no one really knows. Some believe because it is the polar opposite of angel food cake. Either way if you know a chocolate lover, this is the cake to make. The fourth of July is one of our family friends/basically older sisters birthday, since she is currently in school at Azuza, I told her that she has to come over for dinner and cake. 

Her birthday cake ended up being a chocolate cake with chocolate frosting and chocolate glaze to top it all off. Basically chocolate overload. But whats better then that? 

                                      
Even in a house with three people this cake didn't last long. By not long I mean less then 24 hours after it was first cut into. Gina's favorite part was the frosting. As I type she has just finished licking the last of the frosting off of her plate. 

                                           
The original frosting recipe called for semi sweet and unsweetened chocolate. Since I didn't have un-sweeted, I improvised. That's basically what baking is all about half of the time, shaping recipes to what is in your kitchen. Instead I used a Hershey's bar and bittersweet chocolate. I was hoping the bittersweet would counter the super sweet, and it did. This frosting is definitely chocolatey. 


The chocolate glaze really isn't necessary to make this chocolate cake, but I think it takes it to the next level. 
                                       

The glaze basically was a very shiny ganache that set quickly. After making and frosting the cake I stored it in the fridge until it was time to cut into. 


It cut perfectly. The only problem is you may be prone to cut the pieces slightly larger then your normal pieces of cake... but thats ok. After dinner everyone said they were stuffed, but they didn't have any problem finishing a HUGE slice of cake. 


It's one of those things where you say you're full, but then it is just sitting in front of you, and looks so good, so you say just one more bite... and that bite leads to another... and another. Basically this is my new go to cake recipe. It tastes better then store bought. It is a crowd pleaser and no one will believe you didn't buy it from a bakery.

Ingredients:

For the cake:

2 C flour
1 C cocoa powder
1 1/2 tsp baking soda
1/2 tsp salt
1/2 C butter
1 C brown sugar
1 C granulated sugar
3 eggs
1 1/2 tsp vanilla extract
1 1/2 C butter milk ( or 1 1/2 C milk with 1 tablespoon of lemon juice)

For the frosting: 

1/2 C butter
2 C powdered sugar
1 tsp vanilla 
1 Hershey's bar
1 C bittersweet chocolate 

For the glaze:

3/4 C semisweet chocolate
3 tablespoons butter
1 tablespoon light corn syrup
1/2 tsp vanilla

OR if you don't have access to light corn syrup

1 C milk
1 1/4 C semi-sweet chocolate chopped

Directions:

1. Preheat oven to 350. Line and grease the bottom of two 9 inch cake pans with wax paper. After you lay down the wax paper, add more non-stick spray. 
2. Make the cake: mix together the butter and the sugar. Next beat in the eggs one at a time. Then add in the vanilla extract. If using a mixer, beat for a least 5 minutes. 
3.In a separate bowl, mix together the cocoa, flour, baking soda, and salt. 
4.In a measuring cup, measure out 1 1/2 cups of milk and add in the lemon juice. 
5.Alternate adding the flour mixture and the milk into the sugar mixture. Mix until smooth. Evenly pour into the prepared pans. Bake for 20-25 minutes 
3. While the cake is baking make the frosting, cream together the butter and the sugar. Add in the vanilla. Next melt the chocolate and beat it in. Place in the fridge until the cake is done. 
4. In a double boiler, mix together all of the ingredients for either of the chocolate glaze recipes. Stir until smooth, then take off of the heat. 
5. When the cake is done let cool completely. Then take one layer and flip it upside down onto a plate. Slowly peel off the wax paper. Frost this flat half. Next take the wax paper off of the other 9 inch round and stack it on top of the frosted bottom layer. Add more frosting on top. Next pour the ganache over the top of the cake and refrigerate until set. Cut, and enjoy! 


Sunday, June 30, 2013

Gluten Free Banana Bread

Gluten Free Banana Bread


I've never baked with rice flour before, actually I've never baked with any other flour besides all purpose flour. It was on sale at the market so I bought a bag of brown and white rice flour. I was a little skeptical about how this bread would turn out. I tried to find a sugar free gluten free banana bread, but my search turned up empty. So I decided to create my own. I used a equal ration of brown to white rice flour. I also used every baking substitute I know, meaning greek yogurt and apple sauce were utilized. This kept the bread moist and surprisingly sweet.


After hearing horror stories about how gluten free breads came out like hockey pucks, I was very happy with the end product.

At first bite the bread was soft and moist. The added chocolate chunks were a nice surprise and complimented the not over bearing banana flavor. It was sweet due to the natural sweetness of bananas. The bread also stayed light and fluffy. It rose considerable well. The texture of the bread was actually better then that made with all-purpose flour. The fluffiness was comparable to that of a yeast based dinner role. This is not like the normal dense banana breads.


Overall, I liked this banana bread recipe better then the other recipes I have tried using all purpose flour.  Once I combined all of the ingredients I sampled the batter. Since I'm not used to the different texture of the batter provided by the  rice flour, I was afraid it wasn't sweet enough. I added in some sugar, however this can easily be omitted to make the recipe diabetic friendly. If you need a dairy free recipe simply substitute the greek yogurt for oil or margarine.


After sitting for a day the bread will have the same texture as a sponge cake.


Ingredients

2 eggs
2 tsp vanilla
3 bananas
1/3 C unsweetened apple sauce 
6 oz greek yogurt (I used a container of vanilla greek yogurt 5.3 oz)
1 C white rice flour
1 C brown rice flour
3 tablespoons of sugar (optional, add if want a sweeter flavor)
1 tsp baking soda
1 tsp baking powder
1 tsp cinnamon 
1 C dark chocolate chunks 

Directions

Preheat oven to 350. Prepare a 9x5 pan. 
1. Mix together the eggs, smashed bananas, apple sauce, and greek yogurt
2. In a separate bowl mix together the flours, baking soda, baking powder, and cinnamon 
3. Add the wet ingredients to the dry ingredients. 
4. Fold in the chocolate chunks. 
5. Bake for 40-45 minutes.


Gluten Free Peanut Butter Swirled Brownies


Peanut Butter Brownies (Gluten Free)


When I think baking brownies, I don't normally think pull out the blender. Except in this case that is exactly what you need to do. These are the easiest brownies to make. Ever. You simple take all of the ingredients, put it in the blender, mix for about 60 seconds, and pour it into a pan. Thats it. No creaming sugar, or using separate bowls for dry and wet ingredients. And they're gluten free so no flour needed!


These were also the most fudgy brownies I have ever had. You would never imagine they are made with no flour and only 1/2 cup of rolled oats. These are scrumptious. I don't normally use that word, but I feel like it is a perfect description for these brownies. 


You can even see how dense, chocolatey, and moist these are just from the picture. They're also quite addicting. Don't except to be satisfied with just eating one of these, before you can stop yourself you will be reaching for another one. 


Since the batter is made in a blender, it is very liquidy. To create the peanut butter effect, you simply microwave peanut butter and swirl it over the top of the batter like so. A little bit of peanut butter will go a long way in this recipe. If you're really feeling into you spreads, you can even microwave some nutella and swirl it on top as well. 


The only downside to these brownies is you have to wait until they are completely cool before cutting. Because of how moist these brownies are the chocolate easily sticks to any knife if the brownies are not cool. I placed mine in the fridge for 30 minutes after baking. But, I guess if you don't care about perfectly cut brownies then dig right in and enjoy the chocolate peanut butter layers with a big ol scoop of ice cream. 

Since my mother is now on a self proclaimed gluten free diet, I won't hesitate to make these again in the future.

Ingredients

1/2 C peanut butter
1 container vanilla greek yogurt (5.3 oz)
1/4 C milk (skim, soy, almond, whatever your preference)
1 egg
1/4 tsp salt
1 tsp baking powder
1 C granulated sugar
1/2 C cocoa powder
3/4 C old-fashioned rolled oats

Directions:

Preheat oven to 350. Prepare a 8x8 pan by lining with foil and spraying with non-stick spray
1. Place all of the ingredients except for the peanut butter in a blender. Blend until smooth, scrappping down the sides as needed. 
2. Pour batter into prepared pan
3. Melt the peanut butter for 30 seconds in a microwave save bowl. Drizzle the peanut butter over the brownies and swirl with a knife to create a marble effect 
4. Bake for 25-30 minutes or until brownies pull away from the sides of the pan. Wait until cool to cut and serve. 

Friday, June 28, 2013

Cannoli Cups

Cannoli Cups


The first cannoli I ever had was a chocolate one from Mikes in Boston. Since then I haven't met a person who doesn't like canoli. Since I wanted a healthier version of canoli, they shell was made in a cupcake pan. Meaning it was baked instead of fried. I drizzled melted chocolate in the bottom of the pastry cups because addition chocolate makes everything better. I also put cherries in the middle of some of the cannoli cups. These were delicious! A perfect summer time treat.

Ingredients:

For filling:

1 15oz container of whole milk ricotta cheese
1/2 C powdered sugar
2 tablespoons granulated sugar
1 tsp vanilla extract
1/2 C mini chocolate chips 

For cups:

Flour for dusting
1 refrigerated pie crusts 
3 tablespoons granulated sugar
1 tsp cinnamon
8 oz baking chocolate or chocolate chips 

Directions:

1. Combine all of the ingredients for the filling together except for the chocolate chips. Use an electric mixer and mix until creamy. 
2. Place the filling in a gallon storage bag and place in the refrigerator. 
3. Heat oven to 400 F. 
4. Roll out the pie crust onto a floured surface. 
5. Combine the cinnamon and sugar and spread onto the pie crust. Roll the cinnamon sugar with a rolling pin to press the mixture into the dough.
6.With a 3 inch cookie cutter or the bottom of a glass, cut out circles and lightly press them into a mini muffin pan. If you want bigger cups then use a regular muffin pan. This will create the pastry cup for the filling. 
7. Bake for about 10 minutes. Watch carefully and be careful not to burn the pastry. 
8. Melt the chocolate according to the package or in 30 second increments. Fill the bottom of the pastry cups with some of the melted chocolate. 
9. Remove the filling from the refrigerator and cut one corner and pipe the filling into the pastry cups. Sprinkle with mini chocolate chips. If wanted, drizzle some melted chocolate on top of the filling as well.
10. Serve immediately. If the filling sits in the cups they will get soggy. So fill immediately before serving. 

Notes: Filling can be made up to 2 days in advance. 

Wednesday, June 26, 2013

Blueberry Tart


Blueberry Tart


I wanted to make a dessert for dinner and I wanted to venture out from baking cookies and brownies. This is a low calorie, healthy, dessert. It will satisfy your sweet tooth without leaving you feeling guilty. It is a light tart that has the same texture of a cheesecake. 


This recipe makes just the right amount for two tarts. 


You can substitute any fruit you would like in this tart. So if you don't have blueberries on hand don't fret! You can also combine different types of fruit. I would recommend trying raspberries or strawberries.


I think the best part about the blueberries is when some explode a little while cooking.


If you're using a nonstick pan there is no need to use additional non-stick spray. The tarts should come out clean from the pans if you simple tap the bottom of the pan to loosen it.


The first bite was the best!


You can't even feel guilty about eating this because the main ingredient is greek yogurt! I used a low fat vanilla greek yogurt.

 Ingredients

1/2 C greek yogurt (or one individual container) (I used vanilla)
1 egg
1 tablespoon honey
1/2 tsp vanilla
1/2 C fruit ( I used blueberries)

1/3 C graham cracker crumbs
2 tablespoons butter

Directions:

Preheat oven to 350
1. Mix together the butter and the graham cracker crumbs
2. Press this mixture into the bottom of two 4' pie pans or into tart pans. If you don't have these this divide it between four individual cupcake pans. If using nonstick pans there is no need to spray the pans however if you are not, then spray with a non-stick spray. 
3. Mix together the yogurt, egg, honey, and splash of vanilla. Mix until the batter is smooth and not lumpy
4. Divide the batter evenly between the pans. Then take a handful of blueberries and drop them into the batter. They will sink into the pans
5. Bake for 15-20 minutes or until the edges are firm but the middle is soft. Then let cool, garnish with more fruit if you want, and enjoy!